Systematic Component Management: Organizing Hardware with the Screw Organizer Tray
Source:https://l-boxx.com
It starts with a single “clink.” You’re halfway through installing a beautiful new kitchen cabinet or fixing a deck joist when a specialized fastener slips through your fingers and vanishes into the sawdust or—worse—the tall grass. You spend the next twenty minutes on your hands and knees, cursing the “black hole” of your workshop.
In my ten years as a contractor, I’ve seen more projects grind to a halt because of a missing $0.10 screw than because of a broken power tool. A messy workspace isn’t just an eyesore; it’s a massive drain on your operational efficiency.
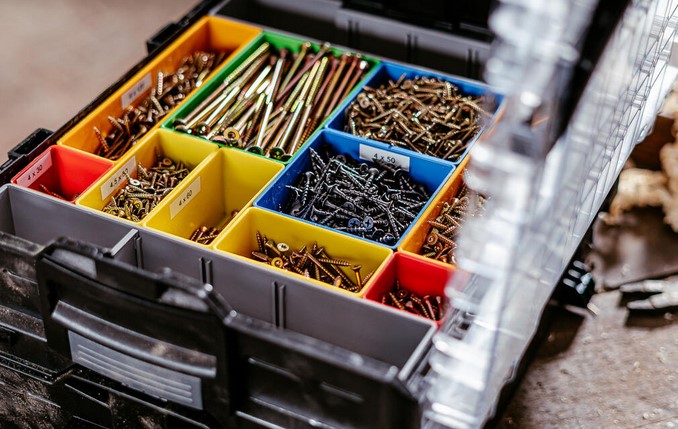
If you want to move from a frustrated “weekend warrior” to a precision-oriented pro, you have to master the art of small-parts storage. The Screw Organizer Tray is not just a plastic box; it is the “external hard drive” for your project’s physical data.
1. The Cost of Chaos: Why Organization is a Technical Necessity
Most beginners think they can manage their hardware using the original cardboard boxes or, heaven forbid, a “junk jar.” Here is the reality: cardboard absorbs moisture, leading to oxidization and surface rust on your fasteners.
I once walked into a facility maintenance job where the lead tech spent 40 minutes looking for a specific M6 stainless steel machine screw. In the world of home improvement, time is literally money. By utilizing a dedicated Screw Organizer Tray, you are creating a “visual index.” Think of it like a library. Without a Dewey Decimal System, a library is just a pile of paper. Without a tray, your workshop is just a metal scrap yard.
2. Choosing Your Weapon: The Anatomy of a High-Quality Tray
Not all organizers are created equal. I’ve seen cheap trays shatter the moment they hit a cold concrete floor. When you are looking for a Screw Organizer Tray, you need to evaluate it based on three “pro-level” criteria:
The “No-Mix” Lid Design
This is the most critical feature. The lid must have ribs or a gasket that sits flush against the internal dividers.
-
The Analogy: Think of it like a bento box. If the lid doesn’t seal, your “wasabi” (tiny finishing nails) will end up in your “sushi” (large lag bolts) the moment you turn the box sideways.
Material Resilience (Polycarbonate vs. Polypropylene)
-
Polypropylene: Flexible and affordable, but can become brittle in freezing garage temperatures.
-
Polycarbonate: This is what “pro-grade” trays are made of. It’s virtually indestructible and crystal clear, allowing you to check inventory levels at a glance without opening the lid.
3. Systematic Categorization: Beyond Just Size
When I set up a new shop, I don’t just throw screws in randomly. I categorize them by application and metallurgy. If you use a zinc-plated screw on a pressure-treated outdoor deck, the chemicals in the wood will eat that screw alive within two years.
How to Divide Your Screw Organizer Tray:
-
The Exterior Zone: Dedicated to ACQ-rated fasteners, deck screws, and stainless steel.
-
The Structural Zone: Heavily weighted for timber screws and lag bolts.
-
The Fine Finishing Zone: Brads, pocket-hole screws, and delicate brass hardware.
-
The Anchor Zone: Wall plugs, toggle bolts, and masonry anchors.
Pro Tip: Always keep a small “miscellaneous” compartment. No matter how organized you are, you will always find that one weird screw from an IKEA cabinet that you might need one day.
4. Engineering Your Workflow: The “Project Tray” Concept
In my decade of experience, I’ve developed a habit that saves hours of frustration. I don’t just have “stationary” storage; I have mobile project trays.
When I start a specific task—say, hanging a series of heavy floating shelves—I don’t keep running back to the main wall-mounted bins. I prep a small Screw Organizer Tray with exactly what I need: 2.5-inch wood screws, the correct drill bits, and the specific wall anchors for that substrate.
This is called “kitting.” By kitting your hardware, you reduce the “cognitive load” of the project. You aren’t hunting for parts; you are simply executing the build.
5. Technical LSI Checklist for Hardware Management
To maintain a professional-grade facility or workshop, pay attention to these technical details that often go overlooked:
-
Tensile Strength and Shear Rating: Keep these labels inside your tray compartments so you know the load-bearing capacity of your fasteners.
-
Drive Types: Separate your Torx (Star drive) from your Phillips and Square drives. Mixing them leads to “cam-out” (stripping the screw head).
-
Galvanic Corrosion Knowledge: Never store different metals in the same compartment if there is any chance of moisture, as this can cause the metals to react and weaken.
6. Expert Advice: The “Hidden” Maintenance of Organizers
Peringatan Tersembunyi (Hidden Warning): Beware of “UV Degradation.” I once lost an entire collection of specialized automotive clips because I left my clear-lidded trays in the path of direct sunlight in my shop. The UV rays made the plastic lid so brittle it shattered like glass when I picked it up. Always store your Screw Organizer Tray in a shaded area or inside a tool chest.
7. Maximizing Utility with Labeling Systems
I’m a firm believer that if it isn’t labeled, it doesn’t exist. Use a high-quality label maker to mark the Length, Gauge, and Thread Pitch of each compartment.
-
The “Penny” Hack: If you have a few loose screws and aren’t sure of the size, keep a small “template card” or a nut-and-bolt thread checker inside your organizer lid. This allows for instant verification before you drive the wrong screw into a piece of expensive walnut.
Conclusion: Organizing Your Way to Mastery
A Screw Organizer Tray might seem like a small investment, but it represents a fundamental shift in your mindset. It’s the difference between being a “handyman” and being an “expert.” When your components are managed systematically, you stop fighting your tools and start focusing on your craftsmanship.
Organization is a discipline, not a one-time event. Once you experience the peace of mind that comes from knowing exactly where every M5 washer and 3-inch deck screw is located, you’ll never go back to the “junk jar” again.
How do you currently handle your “hardware graveyard”? Are you a fan of portable trays, or do you prefer wall-mounted bins? Share your shop organization struggles (or wins) in the comments below!