Systematic Workshop Organization: Maximizing Verticality with the Pegboard Wall
October 10, 2026
No Comments
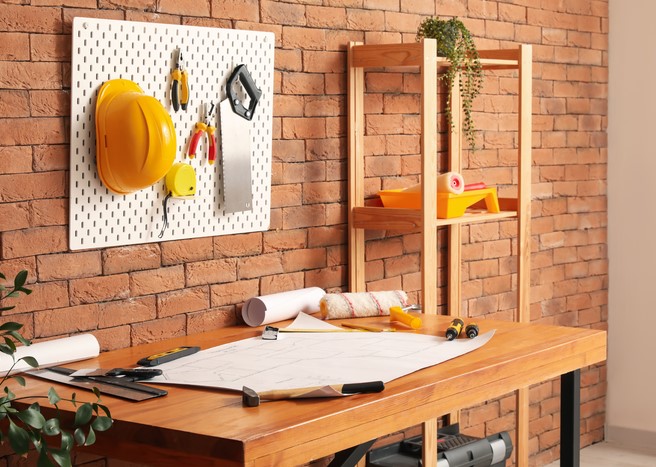 You are midway through building a custom maple entryway bench, the glue is drying fast, and you desperately need your flush-trim saw. You check your workbench surface—it is buried under offcuts, wood shavings, and three different tape measures. After spending seven frustrating minutes digging through a chaotic bottom drawer, you finally locate it, but your momentum is shattered and the joint assembly time has passed.
Over my ten-plus years as a home improvement specialist redesigning residential workshops, garages, and maker spaces, I have witnessed this exact scenario play out on hundreds of job sites. The average DIYer loses up to 25% of their active build time simply searching for misplaced tools.
The fundamental issue is almost never a lack of physical floor space; it is a failure to utilize vertical real estate. Transforming an empty wall into a high-efficiency pegboard wall shifts your workflow from reactive hunting to systematic execution, turning your workshop into a streamlined, professional environment.
The Physics of Vertical Storage: Why Your Workbench Is Failing You
Think of your workbench surface as your computer’s active RAM—it is short-term workspace designed exclusively for the project immediately in front of you. When you stack hand tools, hardware containers, and battery chargers directly on your work table, you overwhelm your active workspace and force your entire build to a crawl.
A strategically constructed pegboard wall acts like an external solid-state drive. By offloading every stationary tool onto the vertical plane, you liberate 100% of your horizontal surface for assembly, sanding, and finishing.
[ Workbench Surface ] ➔ (Reclaimed Active Work Area)
         ▲
         │ (Shift Heavy Storage Upward)
         ▼
[ Vertical Pegboard Wall ] ➔ (Instant Line-of-Sight Access)
-
Instant Line-of-Sight Indexing: Visual recognition is up to five times faster than tactile searching through opaque drawer systems.
-
Zero Footprint Expansion: Vertical storage reclaims wasted airspace without reducing valuable garage parking or walking clearances.
-
Forced Organizational Discipline: An open-wall system immediately highlights missing tools at the end of a work session before you sweep up and lock the doors.
Material Selection: Hardboard vs. Metal vs. Polypropylene Pegboard Walls
Selecting the correct panel substrate determines whether your installation lasts a decade or sags within six months. The market offers three primary materials, each serving distinct load profiles and environmental conditions.
-
Tempered Hardboard (MDF): This is the traditional budget choice made from compressed wood fibers. While affordable, standard hardboard is highly susceptible to ambient humidity, causing holes to elongate or tear out under heavy loads over time.
-
Galvanized Steel or Aluminum: Metal panels represent the gold standard for heavy-duty workshops. They deliver exceptional shear strength, immunity to shop chemicals, and will never crack or sag under the weight of heavy corded tools or cast-iron hand planes.
-
Polypropylene (Rigid Plastic): Synthetic panels offer a lightweight, entirely waterproof alternative ideal for damp basements or outdoor garden sheds where rust prevention is critical.
Deciphering Hole Spacing and Gauge Specifications
Not all perforation patterns are created equal. Commercial panels typically come in two standard perforation configurations:
-
1/8-Inch Perforations (1/2-Inch Center-to-Center): Designed strictly for lightweight applications like craft rooms or sewing stations. They lack the structural integrity required for heavy steel hand tools.
-
1/4-Inch Perforations (1-Inch Center-to-Center): The definitive standard for workshop installations. Always specify 1/4-inch heavy-duty panels to ensure compatibility with robust locking hooks and heavy-duty tool holders.
Step-by-Step Framing and Installation for Maximum Load Capacity
The single most common installation mistake I correct in the field is mounting panels flat against drywall. A pegboard wall requires a consistent rear clearance—known as standoff distance—so that hook insertion tangs can pivot behind the panel freely.
-
Locate and Mark Wall Studs: Use an electronic stud finder to pinpoint your 16-inch center wall studs. Securely anchoring into solid lumber is mandatory for high-capacity setups.
-
Build a Structural Furring Strip Grid: Mount 1×2-inch nominal lumber (furring strips) horizontally across your studs using 2.5-inch construction screws. Space these strips every 16 inches vertically to create the required 3/4-inch rear air gap.
-
Anchor the Panels: Align panel edges along the centerlines of your furring strips. Fasten the board using washer-head cabinet screws every 8 to 12 inches along the perimeter to prevent panel bowing.
-
Set Inter-Panel Expansion Gaps: When tiling multiple hardboard panels side-by-side, leave a 1/16-inch gap between sheets to accommodate seasonal thermal expansion and humidity changes.
Ergonomic Zoning and Layout Optimization
Slapping hooks onto a board at random will quickly reproduce the same chaos you had in your drawers. To maximize efficiency, map your pegboard wall into three distinct ergonomic reach zones based on natural body mechanics.
-
Primary Zone (Chest to Eye Level): Reserve this prime real estate for your daily drivers—screwdrivers, tape measures, combination squares, and claw hammers. These items should require zero bending or reaching.
-
Secondary Zone (Waist to Knees): Position medium-frequency items here, such as specialized pliers, chisel rolls, or safety gear.
-
Tertiary Zone (Overhead and Floor-Level): Store low-frequency or bulky items, such as large framing squares, extension cord spools, or raw material offcut racks.
Pro Tips and Hidden Pitfalls from the Field
Having retrofitted dozens of custom workshops, I have gathered a few non-negotiable tricks that elevate a basic installation into a commercial-grade setup.
Pro Tip: The Silicone Lock TrickNothing is more maddening than pulling a wrench off the wall only for the steel peg hook to detach and crash onto the floor. Skip expensive locking clips—simply apply a small dab of clear 100% silicone caulk to the lower peg tang before inserting it into the hole. It holds the hook rock-solid during daily use but can be peeled off cleanly if you reconfigure your layout later.
Hidden Warning: The Drywall Anchor CollapseNever rely solely on hollow-wall plastic drywall anchors to support a fully loaded tool panel. A fully populated 4×8-foot metal board holding hand planes and power tools can easily exceed 150 pounds. Always span across structural wall studs or utilize heavy-duty toggle bolts rated for high shear stress.
Transform Your Workspace Today
Systematic organization is not about aesthetics; it is about building a space that respects your time and keeps creative momentum flowing. Installing a properly framed, ergonomically zoned pegboard wall eliminates friction at every stage of your build, making your workshop safer and vastly more productive.
What is the biggest organizational headache currently slowing down your garage or workshop projects? Have you made the jump to metal panels, or are you running a classic hardboard setup? Share your current setup or drop your questions in the comments below—let’s optimize your workspace together!