Minimalist Sanitary Engineering: Maximizing Floor Space with the Wall Mount Sink
August 15, 2026
No Comments
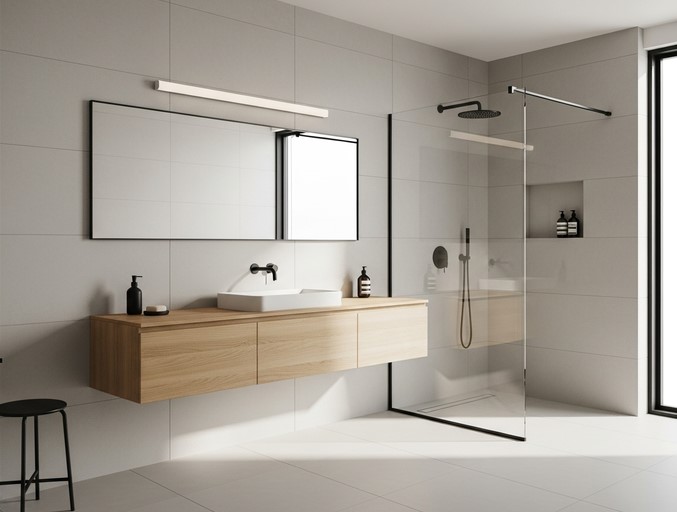
Source:https://hanodecor.com
You step into a small powder room, and your knees immediately bang against a bulky wooden vanity cabinet. You squeeze yourself sideways past the toilet just to wash your hands. If this scenario sounds familiar, you aren’t alone—traditional floor-mounted vanities devour up to 35% of usable floor space in compact bathrooms.
In my decade-plus of knocking down walls, re-routing supply lines, and remodeling cramped urban bathrooms, I’ve learned that spatial efficiency isn’t just about small fixtures; it’s about sightlines and floor clearance. The moment you lift a fixture off the tile, the visual and physical footprint of the entire room changes instantly.
This deep dive explores the engineering, structural rough-ins, and design strategies behind choosing and installing a wall mount sink to unlock maximum square footage in small to mid-sized bathrooms.
The Spatial Physics of Small Bathrooms: Why Floor Clearance Matters
Why does removing a floor cabinet make a tiny bathroom feel twice as large? The secret lies in human perception and architectural sightlines.
When human eyes assess room volume, we subconsciously judge boundaries by continuous floor area. A traditional vanity anchors straight into the floor tile, creating a rigid block that stops the eye dead in its tracks.
By floating the basin above the floor, you achieve three immediate architectural wins:
-
Unbroken Sightlines: Extending visible floor tile all the way to the back wall tricks the brain into perceiving a significantly larger room volume.
-
Ergonomic Toe Clearance: Eliminating the base cabinet provides full, unimpeded leg and foot clearance, preventing awkward bending postures over the basin.
-
Simplified Maintenance: Cleaning becomes seamless when you can run a mop across the entire floor without navigating around base molding or vanity corners.
Think of a traditional vanity like a bulky, low-slung coffee table in a narrow hallway. A floating fixture operates like a floating shelf—it delivers the exact same utility while leaving the traffic lane below completely unobstructed.
Engineering Behind the Wall: Structural and Plumbing Rough-Ins
Mounting a heavy ceramic or stone basin directly to vertical drywall requires proper internal support. You cannot simply drive drywall anchors into a sheet of rock and call it a day.
When you install a wall mount sink, the real magic happens inside the wall cavity during the rough-in stage.
[ Structural Framing: 2x6 Blocking / Metal Carrier Bracket ]
                               |
[ Wall Surface: Cement Board + Tile / Drywall Finish ]
                               |
[ Wall Mount Sink Mounting Bolts / Hanging Cleat ]
                               |
[ Decorative Trap: Bottle Trap / P-Trap Exposed Below ]
1. In-Wall Structural Blocking
A standard vitreous china basin weighs anywhere from 25 to over 70 pounds. Fill it with water, lean heavily on the front rim while washing your face, and the dynamic load on the mounting hardware spikes dramatically.
During framing, we install a continuous piece of 2×6 structural wood blocking notched directly into the studs behind the intended fixture height. For commercial or heavy stone setups, an engineered steel carrier frame is anchored directly to the floor plates inside the wall cavity.
2. Supply and Waste Line Rough-In Placement
Because there is no cabinet doors to hide messy plumbing, exact plumbing positioning is vital:
-
Drain Alignment: Center the waste pipe precisely between the mounting studs at the calculated center point of the basin.
-
Supply Line Height: Set hot and cold water shut-off valves 2 to 3 inches higher than typical vanity heights so they stay neatly tucked beneath the basin profile or sit symmetrically above a decorative bottle trap.
3. Trap Aesthetics: Standard P-Trap vs. Decorative Bottle Trap
Since the waste line remains visible beneath a open-bottom basin, standard black ABS or white PVC pipe can look unfinished. Upgrade to an engineered brass bottle trap (available in matte black, brushed brass, or polished chrome). It maintains proper water seal safety while transforming plumbing into an attractive design element.
Comparing Basin Typologies: Finding Your Layout Fit
Not all floating fixtures are created equal. Depending on your room’s layout, plumbing location, and storage requirements, different floating configurations offer distinct advantages.
| Basin Type | Wall Mounting Hardware | Plumbing Concealment | Best Application |
| Traditional Wall Mount Sink | Bracket / Hanger Plate | Fully Exposed (Bottle Trap) | Ultra-compact powder rooms |
| Semi-Pedestal Basin | Heavy Bolts + Shroud | Concealed via Ceramic Shroud | Mid-sized guest bathrooms |
| Floating Integrated Vanity | Concealed Steel Cleat | Concealed inside Shallow Drawer | Master suites requiring storage |
| Corner Floating Sink | Dual Wall Flange Brackets | Exposed Trap | Awkward, narrow half-baths |
Pro Expert Advice & Hidden Pitfalls
Over my years on job sites, I’ve seen my share of wall-hung fixture disasters—from pulled-out anchors to crooked drain pipes. Here are two critical insights every homeowner should know before swinging a sledgehammer:
Pro Tip: Establish Faucet Height Before DrillingIf you pair a vessel-style floating basin with a wall-mounted faucet, calculate your spout projection meticulously. The water stream should hit directly over the drain opening, 3 to 4 inches above the rim, to prevent water from splashing onto the floor every time you turn on the taps.
Hidden Pitfall: Ignoring Wall Sheathing ThicknessAlways account for the combined thickness of drywall, backer board, thinset mortar, and wall tile when setting your mounting studs or threaded rod depth. Setting mounting bolts too deep into the framing means they won’t extend far enough past finished tile to lock the basin down securely.
Checklist for a Seamless Installation
To make sure your project runs smoothly from demolition to final sealant application, follow this operational sequence:
-
Verify Framing Blocking: Confirm 2×6 blocking or a steel carrier frame is anchored securely to wall studs before closing up the wall.
-
Double-Check Mounting Height: Standard rim height is 32 to 36 inches from finished floor height, depending on primary user ergonomics.
-
Rough-In Plumbing Plumbing: Align supply lines and waste outlets precisely to avoid awkward offset connections under the basin.
-
Tile Behind the Fixture: Run full wall tile down behind where the basin will sit before hanging the fixture to ensure a clean, waterproof seal.
-
Set and Seal: Secure the basin with neoprene washer-backed lag bolts, test for stability under load, and apply a subtle bead of sanitary silicone along the top rear seam.
Final Thoughts
Making a small bathroom feel spacious and modern doesn’t require expanding your home’s footprint. Replacing a bulky floor cabinet with a clean, structural wall mount sink opens up valuable floor space, creates clean architectural lines, and turns functional plumbing into a sleek design feature.
Are you currently planning a small-bathroom renovation or looking for ways to maximize square footage in your home? What challenges are you facing with your current bathroom layout? Drop your questions, thoughts, or renovation stories in the comments below—I’d love to help you work through the details!