Professional Surface Preparation: High-Durability Performance of the Paint Scraper Blade
Source:https://m.media-amazon.com
Picture this: You’ve spent three weekends meticulously choosing the perfect shade of slate blue for your exterior trim. You buy the premium $70-a-gallon paint, apply it flawlessly, and step back to admire your masterpiece. Then, six months later, you notice it—ugly, jagged bubbles forming near the edges, followed by the heartbreaking sight of your expensive new coat peeling away in sheets.
Over my ten years in the home improvement trenches, I’ve seen this exact nightmare play out for dozens of well-meaning DIYers. The culprit is almost never the paint itself; it is almost always what lies beneath.
In my early days, I used to think any metal tool could prep a wall. I learned the hard way that skimping on your prep tools is the fastest route to a failed project. If you want a flawless finish that lasts for a decade, you need to understand the unsung hero of professional surface preparation: the paint scraper blade.
Why Surface Preparation Dictates Paint Longevity
Many homeowners view scraping as a tedious chore to rush through so they can get to the “fun part” of painting. But professional painting is 80% preparation and only 20% application.
Think of your wall as the foundation of a house. You wouldn’t build a mansion on shifting sand. Similarly, applying fresh paint over brittle, flaking, or glossy old layers is a recipe for disaster. The new paint will bond to the old, failing layer, pulling it right off the substrate as it cures and contracts.
To achieve a high-durability performance, you must strip away the past. A high-quality paint scraper blade doesn’t just remove loose debris; it creates a mechanically sound surface. It shears off failed coatings and profiles the wood or masonry so the new primer can actually bite into the pores of the material.
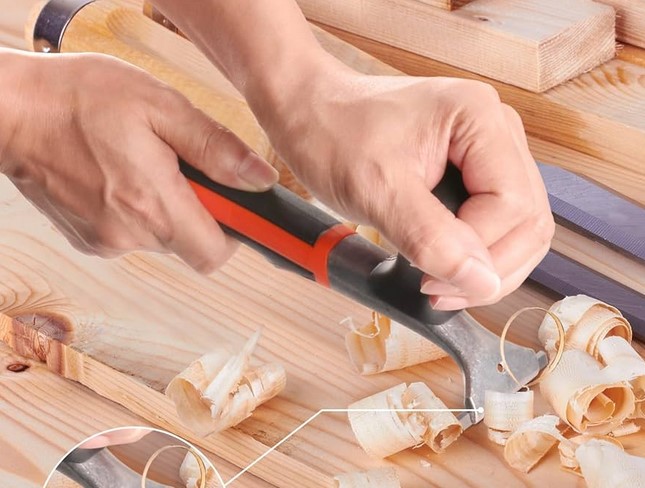
Anatomy of a High-Durability Paint Scraper Blade
Not all blades are created equal. When you walk down the aisle of a home improvement center, you will see options ranging from cheap stamped steel to premium materials. Let’s break down the technical differences so you can choose like a pro.
Carbon Steel vs. Tungsten Carbide
This is the ultimate showdown in the world of scraping.
-
Carbon Steel Blades: These are inexpensive and flexible. They work well for light-duty tasks or curved molding because they have some give. However, they dull incredibly fast. In my experience, scraping dried exterior paint on a hot day will blunt a carbon steel edge in less than twenty minutes, requiring constant sharpening.
-
Tungsten Carbide Blades: This is what the pros use. Tungsten carbide is an engineered compound that is roughly three times stiffer than steel and significantly denser. A carbide paint scraper blade can last up to 50 times longer than a steel counterpart before needing replacement. They remain razor-sharp, allowing you to slice through years of hardened latex and oil-based paint with minimal downward pressure.
Understanding Blade Geometry and Edges
The shape of your blade dictates its function. You will typically encounter two styles:
-
Straight/Flat Edges: Ideal for wide, flat surfaces like siding, decks, and fascia boards. They maximize surface contact to clear large areas quickly.
-
Profiled/Contoured Edges: These feature teardrop, triangle, or curved shapes. If you are restoring historic windows or intricate crown molding, these are indispensable for reaching into tight grooves without gouging the wood.
The Physics of Scraping: How a Premium Blade Saves Your Muscles
Let’s use a quick analogy. Imagine trying to slice a ripe tomato with a dull butter knife. You have to push down incredibly hard, smashing the tomato rather than cutting it. Now, imagine using a razor-sharp chef’s knife—it glides through using nothing but the weight of the knife itself.
Scraping paint follows the exact same principle. When you use a worn-out or cheap paint scraper blade, you have to lean your entire body weight into the tool. By hour three, your wrists are burning, your shoulders are knotted, and you are prone to making mistakes, such as accidentally gouging deep tracks into the wood.
A sharp carbide blade acts like that chef’s knife. It relies on a precise bevel angle to get beneath the paint film. Instead of grinding the paint into dust, it cleaves it cleanly from the substrate, rolling the old paint off in satisfying ribbons. You do less physical work, and the tool does the heavy lifting.
Step-by-Step: Mastering the Scraper for Maximum Efficiency
Having the right tool is only half the battle; you also need the right technique. Here is the exact workflow my crew uses on historical restoration jobs.
1. Safety and Inspection
Before you touch a blade to the wall, determine the age of the property. If your home was built before 1978, there is a high probability of lead-based paint. Never dry-scrape lead paint. Use wet-scraping methods, wear an approved N95 or HEPA respirator, and deploy heavy plastic sheeting to catch all debris.
2. Finding the Right Angle
Hold your scraper at roughly a 15-to-30-degree angle relative to the surface. If your angle is too low, the blade will slide right over the stubborn paint. If your angle is too high, you risk digging the corners of the paint scraper blade into the substrate, creating gouges that you’ll have to patch later.
3. Pull vs. Push Motion
Heavy-duty scrapers are typically designed as “pull” scrapers. Use two hands: one on the handle to provide the pulling force, and your dominant hand over the head of the scraper to apply firm, even downward pressure. Pull along the direction of the wood grain, never across it, to prevent tearing the wood fibers.
| Scraper Type | Best Used For | Pros | Cons |
| Pull Scraper (Carbide) | Flat siding, decks, heavy paint buildup | Extremely durable, effortless cutting | Expensive upfront, rigid |
| Push Scraper (Putty Knife style) | Delicate detail work, soft woods | Great control, inexpensive | Dulls quickly, causes hand fatigue |
| Contoured Scraper | Moldings, spindles, window sashes | Reaches tight profiles | Limited surface area coverage |
💡 Pro Tip: The “Light Test” for Sharpness
Don’t wait until your arms hurt to realize your blade is dull. Periodically hold the edge of your paint scraper blade up to a bright light or the sun. If you see light reflecting off the very edge of the blade, it means the crisp corner has rolled over and flattened out—it’s dull. A perfectly sharp edge will not reflect light; it will look like a clean, invisible line.
Hidden Warnings: Avoiding Expensive Prep Mistakes
Over the years, I’ve had to fix countless mistakes made by enthusiastic DIYers. Here are the traps you need to avoid:
-
The Aggressive Gouge: When dealing with stubborn paint patches, the temptation is to dig in with the corner of the blade. Resist this. Every gouge you create must be filled with exterior wood patch, sanded flat, and primed. You are effectively doubling your workload. Keep the blade completely flat.
-
Neglecting the Edges: Once you scrape away the loose paint, you are left with a sharp “cliff” where the remaining paint meets the bare wood. If you paint right over this, the edge will show through your topcoat. Always use medium-grit sandpaper (around 80 to 120 grit) to feather those edges down until the transition feels completely smooth to the touch.
-
Forgetting to Change Sides: Many premium carbide blades are double-edged or even four-sided. If you notice performance dropping, don’t throw the blade away! Loosen the retaining screw, flip the blade to a fresh edge, lock it back down, and you are back in business.
Conclusion: Investing in the Right Edge
At the end of the day, professional-grade surface preparation isn’t about working harder; it’s about working smarter. Buying a cheap tool might save you ten dollars at the cash register, but it will cost you hours of physical exhaustion and a paint job that fails years before its time. Investing in a high-durability paint scraper blade ensures that your hard work stands up to the elements, keeping your home beautiful for the long haul.
Now, I want to hear from you! What home improvement project are you tackling next, and what has been your biggest struggle with surface prep? Drop your questions or experiences in the comments below—let’s talk shop!